

- Top 10 Computer Pranks 2024
- However, it's essential to be mindful of the impact and potential consequences of any pranks. Here are ten of the most popular computer pranks that have entertained people over the years:
- Remember, pranks should always be harmless, respectful, and done with the consent of the person involved.
Top 10 Computer Pranks 2024
Computer pranks can be fun when done in good spirits and among friends or colleagues who appreciate humor.
However, it’s essential to be mindful of the impact and potential consequences of any pranks. Here are ten of the most popular computer pranks that have entertained people over the years:
Top 10 Computer Pranks
The Classic Screensaver Switcheroo: Change a coworker’s or friend’s screensaver to something unexpected and humorous. It could be a funny image or a rotating collection of memes.

- Download and install the Classic Screensaver Switcheroo app from the Microsoft Store.
- Once the app is installed, open it and click on the “Settings” tab.
- In the “Settings” tab, you can choose which classic screensavers you want to enable. You can also choose how often you want the screensaver to change.
- Once you have made your selections, click on the “Save” button.
- To activate the Classic Screensaver Switcheroo, click on the “Start” button and type “screensaver” into the search bar.
- In the search results, click on “Screen saver settings”.
- In the “Screen saver settings” window, select “Classic Screensaver Switcheroo” from the drop-down list.
- Click on the “Apply” button and then click on the “OK” button.
Top 10 Computer Pranks
Sticky Keys Trick: Swap the functions of the “Ctrl” and “Alt” keys or enable the sticky keys accessibility feature. Watch as the victim struggles with typing and shortcuts.

- Press the Shift key five times in a row.
- A dialog box will appear asking if you want to turn on Sticky Keys. Click on the No button.
- The Sticky Keys feature will now be enabled.
- Press the Shift key and another key at the same time. The Shift key will now be held down until you press it again.
- You can use this trick to hold down any key on your keyboard.
To disable Sticky Keys, press the Shift key five times in a row again. The dialog box will appear again, and this time you should click on the Yes button.
Here are some additional tips for using the Sticky Keys Trick:
- You can also use Sticky Keys to type special characters. For example, to type the “@” symbol, press the Shift key and the 2 key at the same time.
- You can disable Sticky Keys by pressing the Shift key five times in a row, even if Sticky Keys is not currently enabled.
- Sticky Keys is a great accessibility feature for people who have difficulty pressing multiple keys at the same time.
Top 10 Computer Pranks
Fake Software Update: Create a fake pop-up notification or email that appears to be a software update and prompts the user to click on it, only to reveal a humorous message or image.

Keyboard Key To Update Software Or Information
- Open the Windows Notifications settings. You can do this by clicking on the Start button and typing “notifications” into the search bar.
- In the Notifications settings window, click on the “Create a notification” button.
- In the Create a notification window, enter the following information:
- Title: The title of your notification.
- Message: The message of your notification.
- App name: The name of the app that is sending the notification.
- Icon: The icon that you want to use for your notification.
- Sound: The sound that you want to play when your notification is received.
- Action: The action that you want to take when your notification is clicked.
- Click on the Create button.
Your notification will now be created. You can test your notification by clicking on the “Send a test notification” button.
Here are some additional tips for creating pop-up notifications in Windows:
- You can use the “Advanced” tab in the Create a notification window to customize your notification further.
- You can create different types of notifications, such as toast notifications, balloon notifications, and action notifications.
- You can use the “Schedule” tab in the Create a notification window to schedule your notification to be sent at a later time.
Top 10 Computer Pranks
Desktop Background Swap: Take a screenshot of a friend’s desktop, set it as their wallpaper, and then hide all their icons. Watch them try to click on non-existent icons in confusion.
- Right-click on an empty area of your desktop and select Personalize.
- In the Personalization window, click on the Background tab.
- Under Background, select Picture from the drop-down menu.
- Click on the Browse button and select the image that you want to use as your desktop background.
- You can also choose to Slideshow your background images by selecting Slideshow from the drop-down menu and then clicking on the Browse button to select the images that you want to use.
- To set a specific time interval for the slideshow, click on the Change picture every drop-down menu and select the desired interval.
- Once you have selected your desired background image or slideshow, click on the Save button.
Your desktop background will now be updated.
Here are some additional tips for changing your desktop background in Windows:
- You can also use the Windows+Ctrl+B keyboard shortcut to open the Personalization window and go to the Background tab.
- You can use the Windows+D keyboard shortcut to quickly minimize all of your windows and view your desktop background.
- You can use the Windows+Shift+S keyboard shortcut to take a screenshot of your desktop background.
Top 10 Computer Pranks
AutoCorrect Shenanigans: Play with the autocorrect settings on a friend’s computer, replacing common words with funny or absurd alternatives.

- Open the Settings app. You can do this by clicking on the Start button and typing “settings” into the search bar.
- In the Settings app, click on Devices > Typing.
- Under Autocorrect, you can change the following settings:
- Replace text as you type: This setting allows you to replace certain words or phrases with other words or phrases as you type. For example, you could set this setting to replace “teh” with “the”.
- Correct spelling automatically: This setting automatically corrects spelling errors as you type.
- Capitalize first letter of sentences: This setting automatically capitalizes the first letter of sentences.
- Correct accidental capitalization: This setting automatically corrects accidental capitalization, such as when you type “I’m” instead of “im”.
- Show autocorrect suggestions: This setting shows autocorrect suggestions as you type.
- Include numbers and symbols when suggesting: This setting includes numbers and symbols when suggesting autocorrect corrections.
- Once you have made your desired changes, click on the Save button.
Your autocorrect settings will now be updated.
Here are some additional tips for changing autocorrect settings in Windows:
- You can also use the Windows+I keyboard shortcut to open the Settings app and go to the Typing settings.
- You can use the Ctrl+Space keyboard shortcut to accept an autocorrect suggestion.
- You can use the Backspace key to remove an autocorrect suggestion.

Top 10 Computer Pranks
Mouse Sensitivity Prank: Adjust the mouse sensitivity to the highest or lowest setting, leaving the user baffled by the erratic mouse movements.
- Open the Settings app. You can do this by clicking on the Start button and typing “settings” into the search bar.
- In the Settings app, click on Devices > Mouse.
- Under Pointer, you can adjust the following settings:
- Pointer speed: This setting controls how sensitive your mouse is. A higher pointer speed means that your mouse will move more quickly across the screen when you move it.
- Enhance pointer precision: This setting allows Windows to smooth out the movement of your mouse cursor. This can be helpful if you find that your mouse cursor is jerky or erratic.
- Double-click speed: This setting controls how quickly you need to double-click a button in order for it to register as a double-click. A higher double-click speed means that you need to click more quickly in order for it to register as a double-click.
- Once you have made your desired changes, click on the Save button.
Your mouse sensitivity settings will now be updated.
Here are some additional tips for adjusting mouse sensitivity in Windows:
- You can also use the Windows+I keyboard shortcut to open the Settings app and go to the Mouse settings.
- You can use the Mouse settings to change other mouse-related settings, such as the cursor shape and the scroll speed.
- You can use the Windows+X keyboard shortcut to open the Power User Menu and select Mouse to open the Mouse settings.
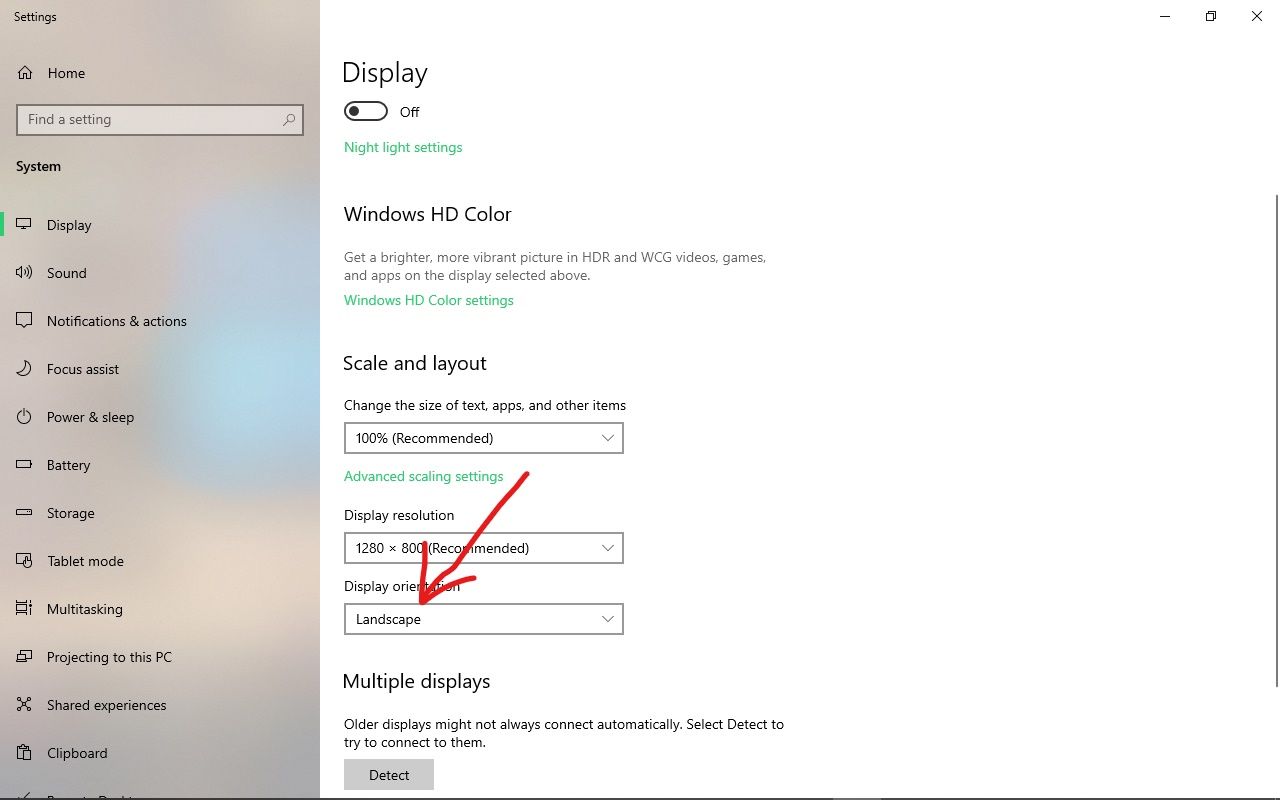
Flip the Screen: Use keyboard shortcuts (Ctrl + Alt + arrow keys) to rotate the screen display. Watch your friend or coworker struggle to get their screen back to normal.
Inverted Colors: Change the display settings to show inverted colors. Everything will look like a negative photo!
- Open the Settings app. You can do this by clicking on the Start button and typing “settings” into the search bar.
- In the Settings app, click on Ease of Access > Color and high contrast.
- Under Color inversion, toggle the Turn on color inversion switch to On.
- You can also adjust the following settings:
- Invert all colors: This setting inverts all of the colors on your screen.
- Invert only color content: This setting inverts only the color content of your screen, leaving the brightness and contrast unchanged.
- Use high contrast colors: This setting uses high contrast colors for text and backgrounds.
- Once you have made your desired changes, click on the Save button.
Your display settings will now be updated.
Here are some additional tips for changing the display settings to show inverted colors in Windows:
- You can also use the Windows+I keyboard shortcut to open the Settings app and go to the Ease of Access > Color and high contrast settings.
- You can use the Ctrl+Alt+I keyboard shortcut to toggle color inversion on and off.
- You can use the Alt+Left Arrow and Alt+Right Arrow keyboard shortcuts to cycle through the different color inversion modes.
Top 10 Computer Pranks
Ghost Typing: Install a remote control software (with their permission) and randomly type harmless messages or open and close applications while they watch in confusion. Teamviewer is a free software you can use to pull this computer prank off.
Top 10 Computer Pranks
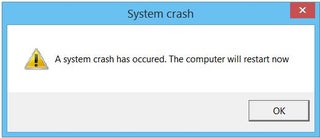
Fake Error Messages: Create a fake error message pop-up that appears with a funny or unexpected message, causing momentary panic.
- Press the ⊞ Win+R keys simultaneously.
- Type notepad into the Run dialog.
- Hit ↵ Enter or click OK.
Copy and paste the following code into Notepad:
- x=msgbox(“Your Message Here”, Button+Icon, “Your Title Here”)
Customize the button(s) of your error message. Replace Button in the code you pasted into Notepad with one of the following:
- 0 – OK
- 1 – OK and Cancel
- 2 – Abort, Retry and Ignore
- 3 – Yes, No and Cancel
- 4 – Yes and No
- 5 – Retry and Cancel
Customize the icon of your error message. Replace Icon in the code that you pasted into Notepad with one of the following:
- 0 = No Icon
- 16 = Critical Icon (a.k.a. “X” icon)
- 32 = Question Icon (a.k.a. “?” icon)
- 48 = Warning Icon (a.k.a. “!” icon)
- 64 = Info Icon (a.k.a. “i” icon)
Customize the title of your error message. Replace Your Title Here in the code you pasted into Notepad with what you want the title of the error message to be.
Customize the contents of your error message. Replace Your Message Here in the code you pasted into Notepad with what you want the error message to say.
Expand the combo box next to Save as type and select All Files.
Type a name for your file followed by a period and vbs.
Choose a location to save the file to.
Save the file. Click Save.
Display the error message. Double-click the file that was created.
Remember, pranks should always be harmless, respectful, and done with the consent of the person involved.
Always ensure that the individual you are pranking has a good sense of humor and will not be upset or distressed by the prank. When done right, computer pranks can create memorable and lighthearted moments among friends and colleagues.
Top 10 Computer Pranks

That Tech Jeff: Affordable and Honest Online Computer Help
That Tech Jeff is a computer repair and tutoring service that offers affordable and honest online help for PC and Macs. With over 1200 five-star reviews, That Tech Jeff is the trusted choice for computer help from anywhere in the world.
That Tech Jeff has been offering online computer help since 2007, and has over 26 years of experience in the industry. Jeff is a certified technician who can diagnose and fix any computer problem quickly and efficiently.
That Tech Jeff offers a flat rate for all services, so you don’t have to worry about hidden fees or hourly charges. If your problem is not fixed, you don’t pay.
Sources for Pranks
- YouTube Channels: Some YouTube channels focus on pranks and might have a section dedicated to computer-related pranks. Look for channels that emphasize safety and consider the reactions of others.
- Tech Blogs: Websites like Lifehacker or How-To Geek sometimes feature tech-related pranks, especially around April Fools’ Day.
- Reddit: Subreddits like r/funny or r/humor might have threads where users share harmless pranks they’ve tried on their friends or coworkers.
- Pinterest: Surprisingly, Pinterest has boards where users pin prank ideas, including computer-related ones. Just use search terms like “computer pranks” or “funny tech tricks.”

Leave A Comment
You must be logged in to post a comment.