💡 DIY Computer Fixes?
Grab my easy step-by-step guide and keep your computer running like new.
Transfer My Files From Old Computer to New

There are several ways to transfer files from an old computer to a new one, depending on the type and amount of files you want to transfer, the devices you have available, and your personal preferences. Here are some common methods:
External hard drive:
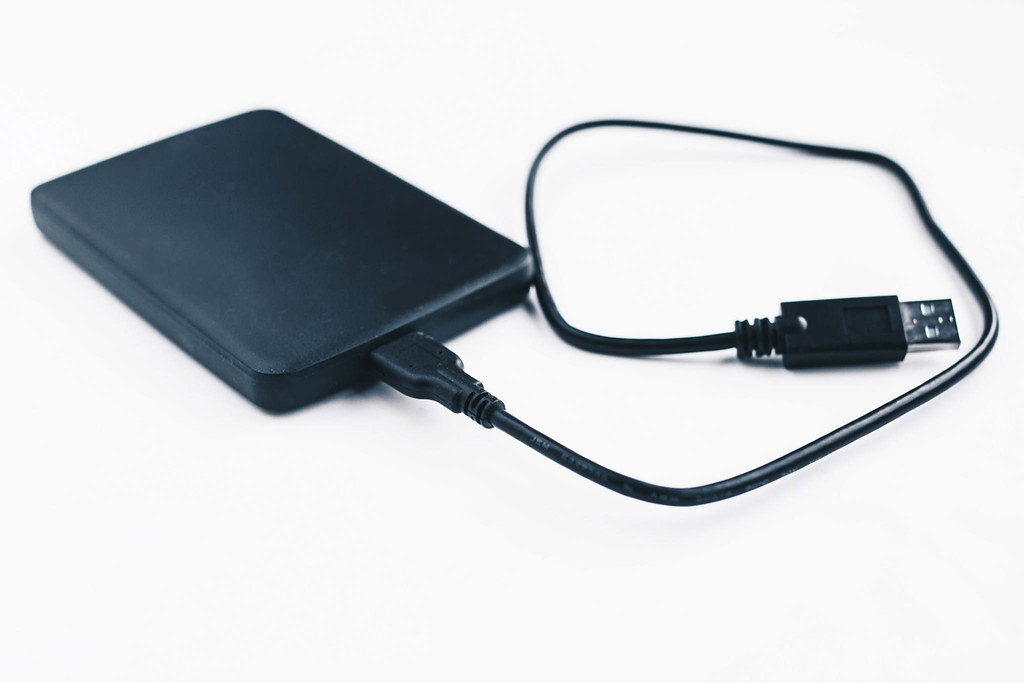
You can transfer your files to an external hard drive from your old computer, and then connect the hard drive to your new computer and copy the files over.
Transferring files to an external hard drive is a simple process that can be completed in a few easy steps. Here’s how:
Connect the external hard drive to your computer using the USB cable provided with the drive.
Wait for your computer to recognize the drive and install any necessary drivers or software.
Open File Explorer (Windows) or Finder (Mac) and locate the files you want to transfer.
Select the files or folders you want to transfer by clicking on them.
Right-click on the selected files or folders and choose “Copy” or press Ctrl+C (Windows) or Command+C (Mac).
Open the external hard drive folder in File Explorer or Finder.
Right-click inside the folder and choose “Paste” or press Ctrl+V (Windows) or Command+V (Mac).
Wait for the files to transfer to the external hard drive. The transfer time will depend on the size of the files and the speed of your computer and external hard drive.
Once the transfer is complete, safely eject the external hard drive from your computer by clicking on the “Eject” button in File Explorer or Finder.
Cloud storage:

You can upload your files to a cloud storage service, such as Dropbox, Google Drive, or OneDrive, and then download them on your new computer.
How to upload your files to a cloud storage service
To upload your files to a cloud storage service, follow these general steps:
Choose a cloud storage service: There are many cloud storage services available, such as Google Drive, Dropbox, OneDrive, iCloud, etc. Choose a service that suits your needs.
Create an account: If you don’t already have an account, create one by following the instructions on the cloud storage service’s website.
Download the service’s app or access it through the website: Most cloud storage services have a desktop app or a web interface that allows you to access your files and upload new ones.
Locate the upload button: Depending on the service, you may have to click on a button that says “Upload” or “Add files” to start the process.
Select the files you want to upload: Use the file browser to navigate to the location of the files you want to upload. You can usually select multiple files at once by holding down the Ctrl or Command key while clicking on them.
Start the upload: Click on the upload button and wait for the files to upload. Depending on the size and number of files, this process may take some time.
Verify the upload: Once the upload is complete, double-check that the files have been uploaded successfully by navigating to the folder where you uploaded them.
Organize your files: If necessary, create folders and move files around to keep everything organized.
Sync your files: Some cloud storage services automatically sync your files between devices. If you want to access your files on multiple devices, make sure that the service you’re using offers this feature and that it’s enabled.
That’s it! Your files are now safely stored in the cloud and accessible from anywhere with an internet connection.
Network transfer:

If both your old and new computers are connected to the same network, you can transfer your files over the network using a file-sharing feature like Windows File Sharing or macOS AirDrop.
How to transfer your files over the network
Transferring files over a network is a common task and can be accomplished in several ways. Here are some methods that you can use to transfer your files over a network:
File Transfer Protocol (FTP): FTP is a standard protocol used to transfer files between servers and clients over a network. You can use an FTP client like FileZilla to connect to a remote server and transfer files securely.
Secure Copy (SCP): SCP is a command-line utility that enables secure file transfer between hosts on a network. You can use SCP to transfer files between two remote hosts or between a local host and a remote host.
Windows File Sharing: If you are using a Windows-based computer, you can share your files with other users on the network. Simply right-click on the folder you want to share and select “Share” from the context menu. You can then specify which users can access the shared folder.
Cloud storage: Cloud storage services like Google Drive, Dropbox, and OneDrive allow you to store your files in the cloud and access them from any device connected to the internet. You can share your files with others by giving them access to the shared folder or by sharing a link to the file.
Email: If you have a small file that you need to transfer, you can attach it to an email and send it to the recipient. However, keep in mind that there are limits on the file size that can be attached to an email.
In general, the method you choose to transfer your files over a network will depend on your specific needs and the tools available to you.
USB flash drive:
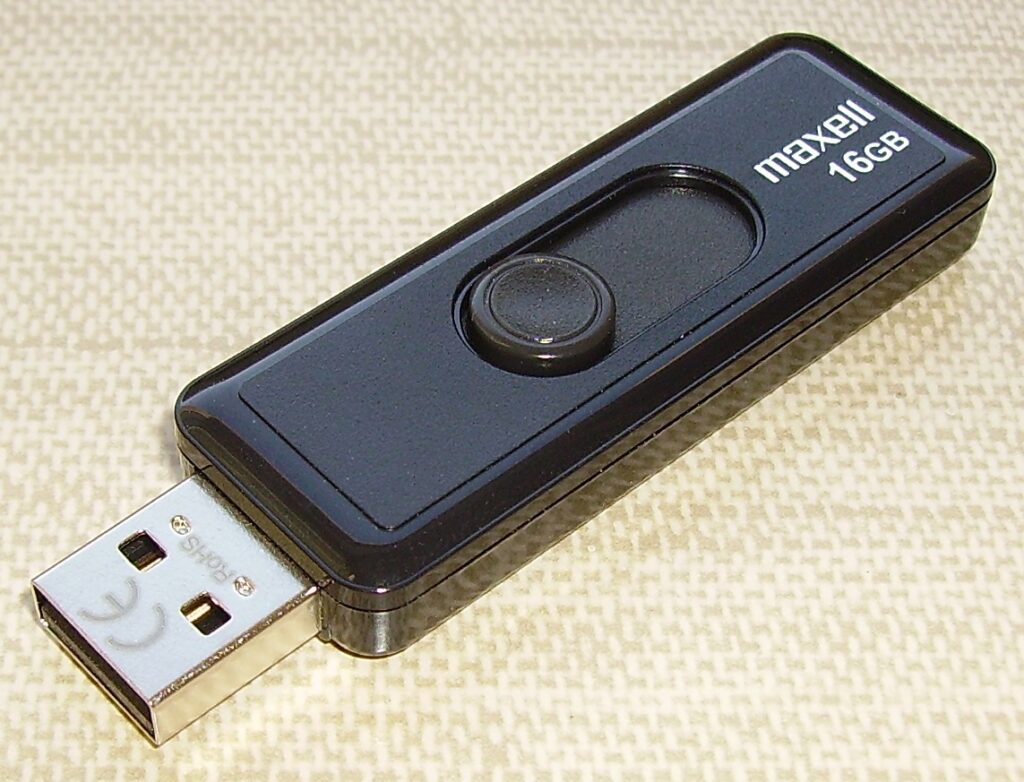
You can copy your files to a USB flash drive and then insert the drive into your new computer to copy the files.
How to copy your files to a USB flash drive
Copying files to a USB flash drive is a straightforward process. Here are the steps you can follow:
Insert your USB flash drive into a USB port on your computer.
Wait for your computer to recognize the USB flash drive. It may take a few seconds for the drive to appear on your desktop or in the file explorer.
Open File Explorer (Windows) or Finder (Mac) and navigate to the files you want to copy.
Select the files you want to copy to the USB flash drive.
Right-click the selected files and choose “Copy” or press “Ctrl+C” (Windows) or “Command+C” (Mac) on your keyboard.
Navigate to the USB flash drive in File Explorer or Finder.
Right-click inside the USB flash drive folder and choose “Paste” or press “Ctrl+V” (Windows) or “Command+V” (Mac) on your keyboard.
Wait for the files to finish copying to the USB flash drive. This may take a few seconds or several minutes, depending on the size of the files and the speed of your computer.
Once the files have finished copying, eject the USB flash drive from your computer by right-clicking on the drive and choosing “Eject” or “Safely Remove Hardware.”
Remove the USB flash drive from the USB port on your computer.
Transfer cable:

You can use a transfer cable to directly connect your old and new computers and transfer files using the Windows Easy Transfer or Mac Migration Assistant tool.
How to transfer files using the Windows Easy Transfer or Mac Migration Assistant tool
To transfer files using the Windows Easy Transfer or Mac Migration Assistant tool, follow these steps:
For Windows Easy Transfer:
Open the Windows Easy Transfer tool on your old computer. You can find it by searching for “Windows Easy Transfer” in the Start menu.
Choose how you want to transfer the files. You can use an external hard drive, a network connection, or a special transfer cable.
Follow the on-screen instructions to select the files and settings you want to transfer. You can choose to transfer user accounts, files, and settings.
Once the transfer is complete, you can disconnect the transfer cable or external hard drive and start using your new computer.
For Mac Migration Assistant:
Open Migration Assistant on your new Mac. You can find it in the Utilities folder within the Applications folder.
Choose how you want to transfer the files. You can use a Time Machine backup, an external hard drive, or a network connection.
Follow the on-screen instructions to select the files and settings you want to transfer. You can choose to transfer user accounts, files, and settings.
Once the transfer is complete, you can disconnect the external hard drive or stop sharing the network connection and start using your new Mac.
Note: Both Windows Easy Transfer and Mac Migration Assistant are designed to transfer files and settings from an old computer to a new one. They may not transfer certain programs or applications that need to be reinstalled on the new computer.
Choose the method that works best for you based on the types and size of files you want to transfer, the devices you have available, and your personal preferences.
Not comfortable doing this yourself?
That Tech Jeff can transfer your files, install your applications, install your printer, and setup email if necessary for just $69.99.
That Tech Jeff can help you with your computer no matter where you live! Get online computer help or computer tutoring no matter where you live. Just read the more than 1000 five-star reviews. (thumbtack and google combined)
That Tech Jeff has 26 years experience and has offered computer help online since 2007. Before you head to Geek Squad get That Tech Jeff’s advice. Its free.
Affordable and honest FLAT RATE online help – no hourly charge.
You pay just one price if your problems are fixed and nothing if not.